Binding of love…

The wedding of a dear friend prompted a collaboration with three others in our women’s circle. One took luminous photos of the ranchland that is the literal grounding force for the newlyweds. The second hand painted a complementary layer of floral and textural patterns in rich metallics and natural hues. The third created a unique essential oil for the couple. My role was to create the book and protective sleeve. When I received the painted photographs, already folded in half, I had no idea what I was going to do. I have never made a book before. But I knew I only had one shot at getting the design right, so I decided to create some mock-ups. My experiments (not pictured) turned out to be crucial in finding the right design solution. A traditional codex binding would put stitching down the center of each painting; Simply gluing the paintings front to back seemed risky and might create warped pages. Searching for ideas in books and on the internet, I happened upon the star fold binding technique. Nested, folded pages in varying lengths are put together to create a book that fans into a star pattern; each painting can open fully without any binding stitches down the center. The added bonus is that the book itself is a sculptural piece.

A traditional codex binding would put stitching down the center of each painting. Simply gluing the paintings front to back seemed risky and would likely create warped pages. Searching for ideas in books and on the internet, I happened upon the star fold binding technique. Nested, folded pages in varying lengths are put together to create a book that fans into a star pattern; each painting can open fully without any binding stitches down the center. The added bonus is that the book itself is a sculptural piece.

Watercolor paper was cut to a size a couple inches longer than the paintings, folded in half, and stitched into a traditional codex. The paintings were then glued to the forward edges of pages. I used museum board and metallic scrapbook paper for the cover and stitched the cover to the pages using copper wire. The heart charms represent the bride, groom, and the bride’s two children from a previous marriage.

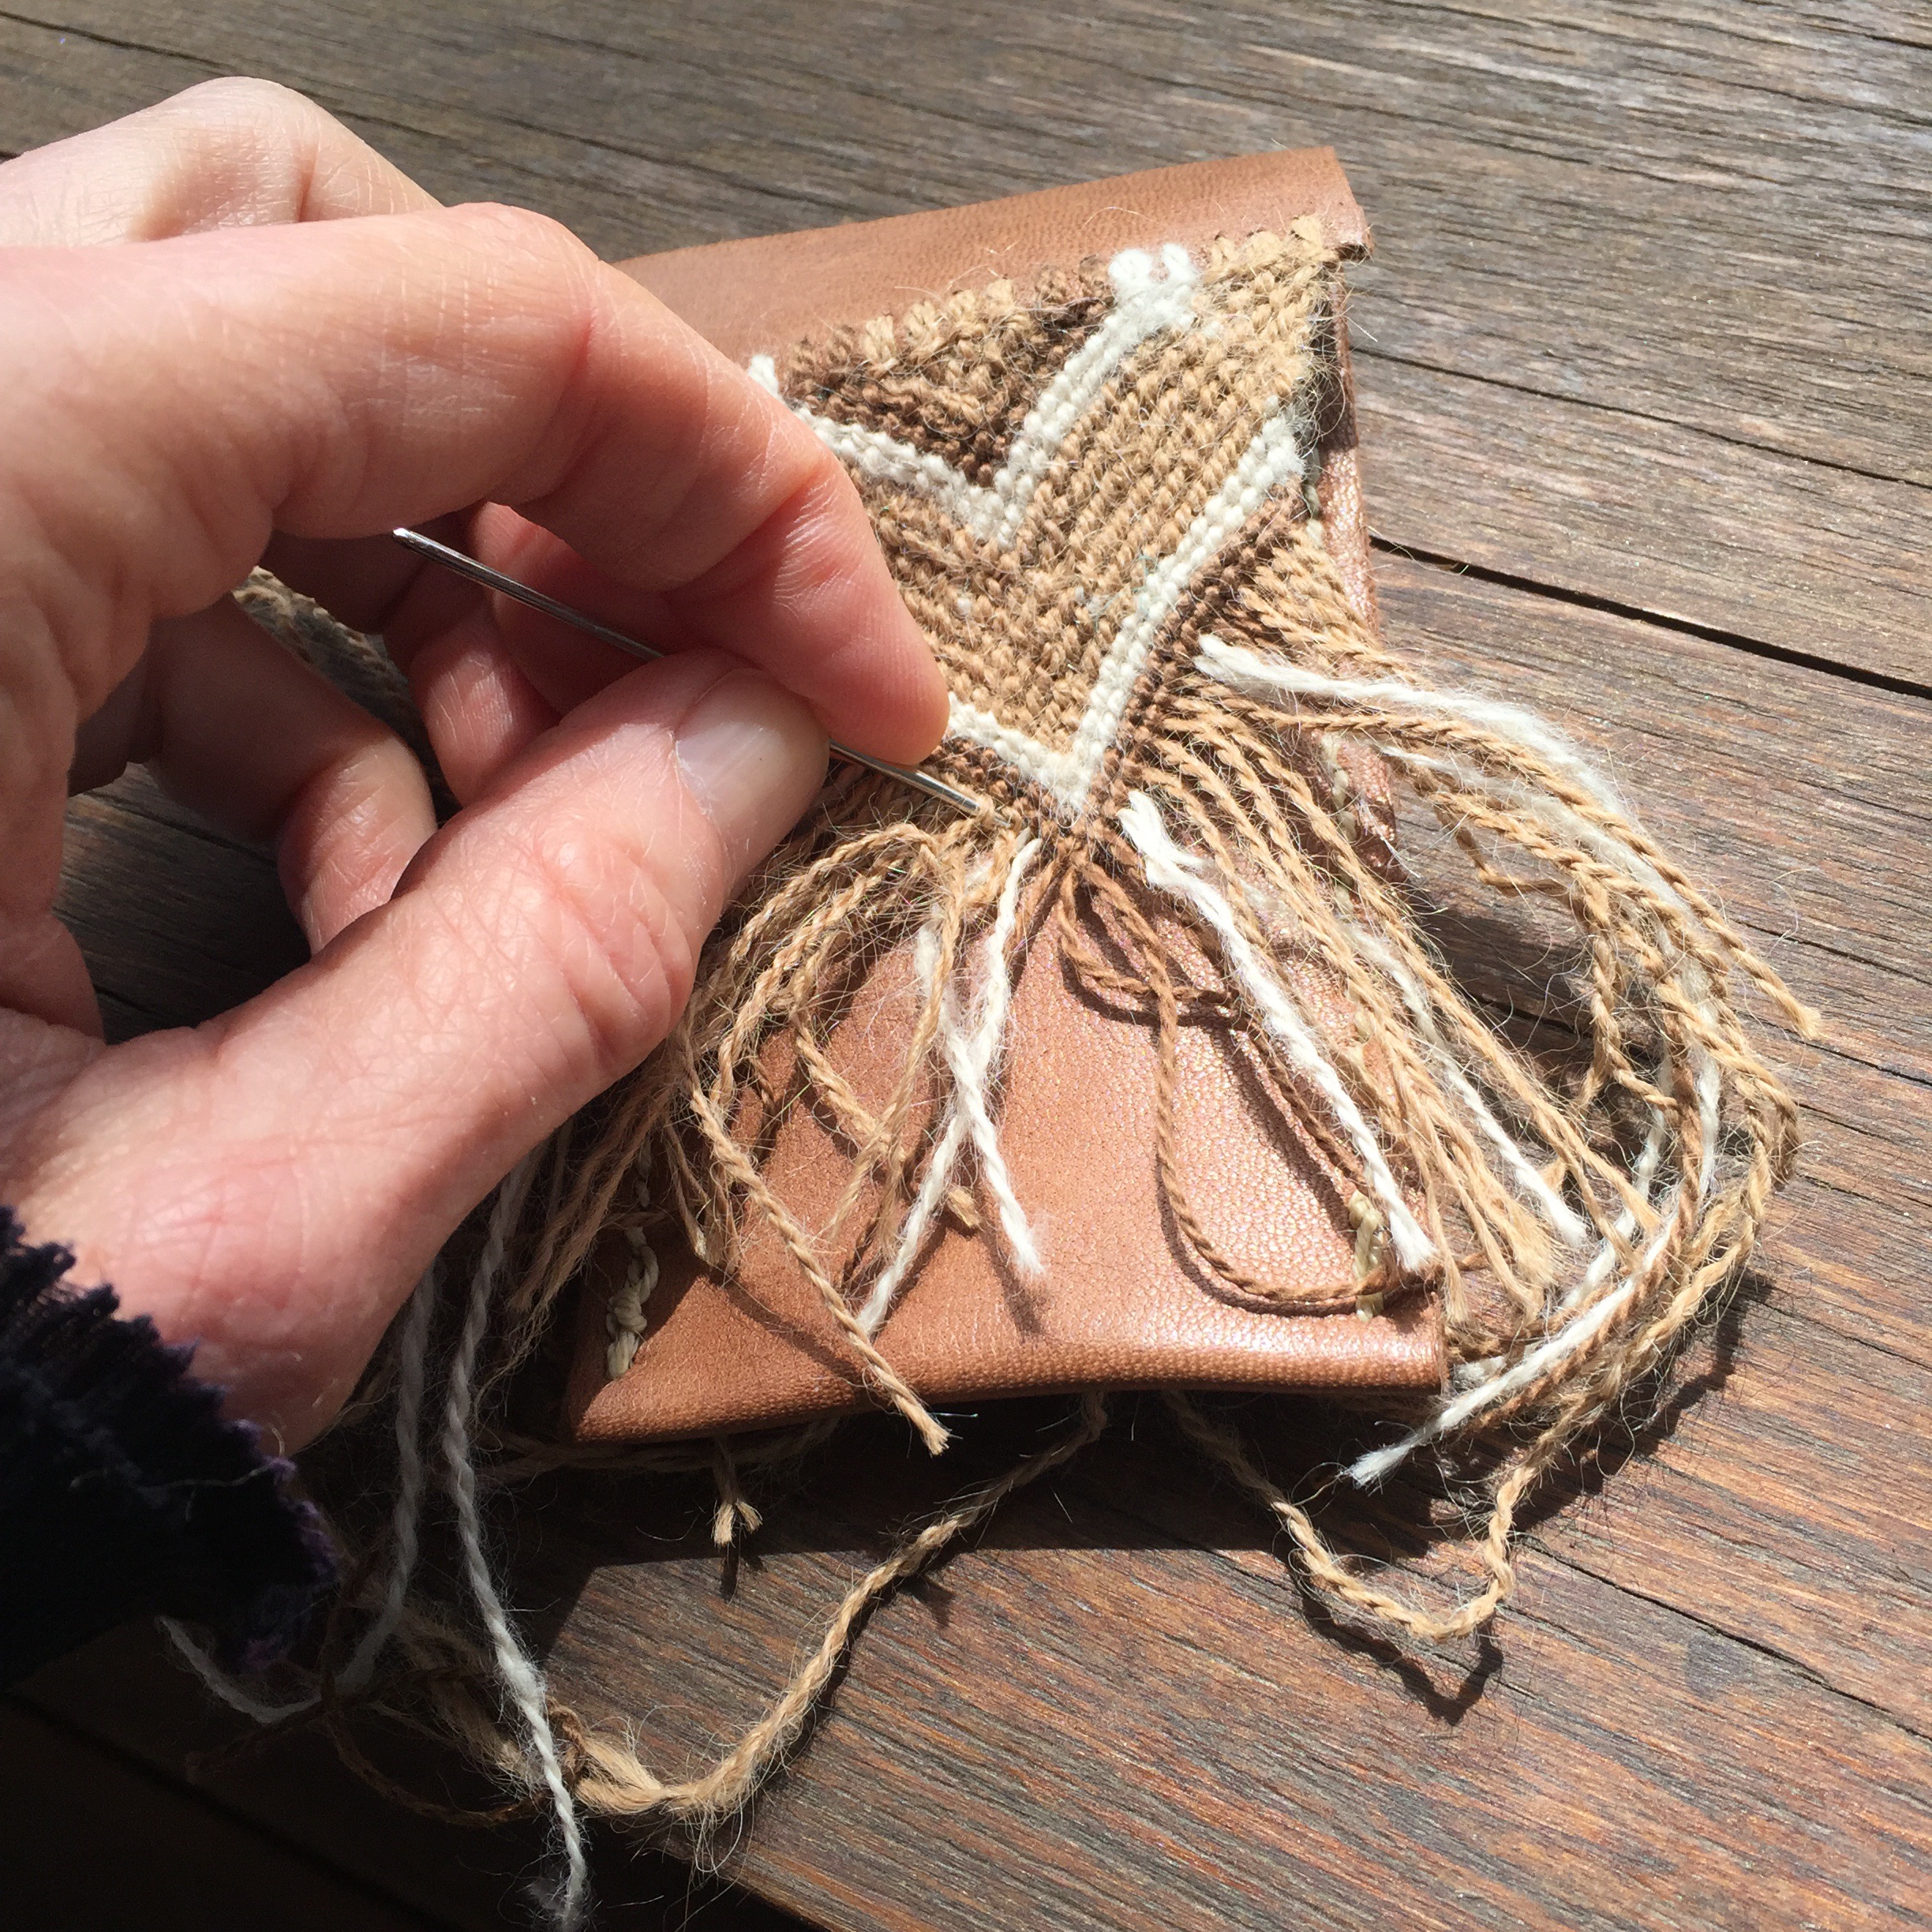
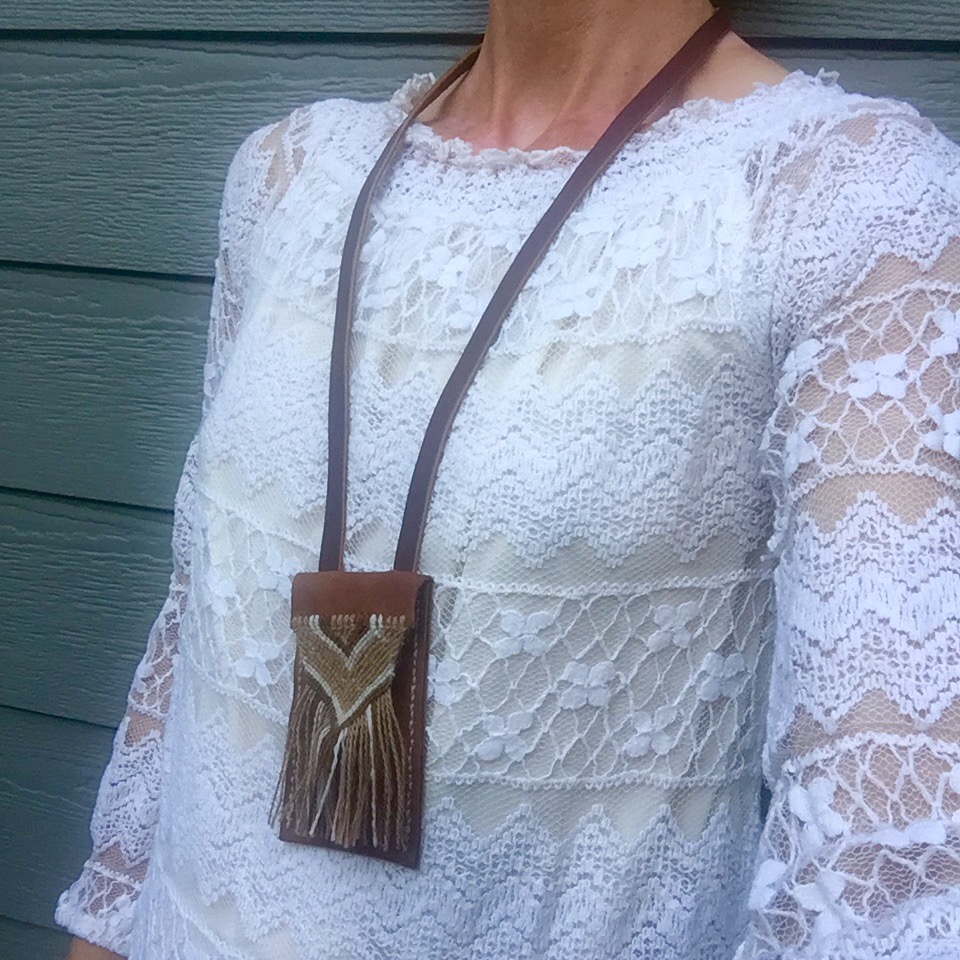
For the sleeve, I wet felted natural brown and beige alpaca roving, incorporating a small pouch for the essential oil.

I am so happy with the outcome. It is as uniquely beautiful as the couple who received it.

Woolly jewelry…

Winter is lingering here in Central Oregon. Skies are gray, snow is falling, and temperatures are hovering around 30 degrees. Warm layers and outerwear are still the required clothing, so wool jewelry is a perfect accessory. Using natural, cream-colored alpaca wool roving and yarn, I made a wrist cuff, earrings, rings, and necklace by combining the processes of wet felting, needle felting, and hand stitching. Minimal, modern, and monochromatic – this set of wool jewelry adds a gesture of warmth to the winter wardrobe. Some items are available in my Etsy shop.

Handmade Hearts…


As a maker, you would think that I never buy commercial Valentine cards. In a perfect world, I would make all holiday and event gifts, cards, and decor by hand. Now just imagine that. Not happening. I buy things like most everyone else, and for the same reasons. Time, resources, personal tastes, etc. So this year I bought Valentines with cute erasers for my 6yr old to give to her classmates. And then I felt guilty. How many cards are actually saved? What is the real lasting value? I bet all of these end up in the trash or recycle bin. In our home, we have amassed quite a collection of (unused) erasers and pencils from every holiday and birthday. Too much stuff.

So I returned the Valentines and erasers to the store, then sat down with my daughters to create special hand made hearts using supplies we already had at home.

The first is a transparent heart filled with glitter and iridescent paper hearts inscribed with sweet phrases. The plastic for the heart was cut from packaging for a bed linen set. We used a sewing machine to stitch the edge in pink thread, but handstitching would be extra special.

Next, we made a 3D heart ornament using a hot pink paper that we had collected from a recycling bin. Using a paper punch, we cut 14 hearts, folded them in half, and glued them together. We added the ribbon before gluing the final sides.

Finally we cut up an old, dark pink, wool sweater that we first felted by washing and drying hot. Felted wool can be cut without unraveling. We used a sewing machine to stitch around the edge with pink thread, filling the heart with polyester fill that we had saved from an old stuffed animal. “Love” was handstitched onto the heart with cream wool yarn.

I can never assume that these handmade Valentines will be saved or cherished any longer than a storebought one. But I’m OK with that since the resources we used were either on-hand, or upcycled. The real value is the experience of making them and giving them away. That is a lasting, joyful memory.

From pajamas to scarf…


There are many ways to cope with mistakes or the unexpected. Sometimes you just have to plow through, even if the end product is disappointing. Like a batch of sugar cookies that are just slightly misshapen or a little too brown on the edges. It’s OK. They will still taste good. Sometimes, you have to back up a bit and fix the error because a crooked seam means a misfitted garment. In rare moments, a total do over is the only choice. And still other times you find a way to create something totally new from a bad moment.

I had a favorite pair of flannel pajama bottoms. I wore them often. And one day as I was shoveling snow from our driveway, the rear seam ripped. I was so disappointed. And grateful there was no one, but the cold wind, to witness my exposed behind. Back inside the house, I discovered the fabric itself had failed, leaving me no easy option to restitch the seam. I did not want to just toss my favorite pajamas bottoms. In an instant, I had an idea – to make an infinity scarf.

I cut off the waistband, leg hems, and side seams and salvaged two long pieces of flannel. I further cut the irregular edges to create two even rectangles. Then I stitched them together along the short edges to create a loop of fabric. So simple.

What can you imagine and make from the unexpected?

Handmade Holidays…


Winter has officially arrived with the first snowfall of the season. It has been a busy few months here on our new property. Observing the seasonal changes of this high desert landscape has been a favorite activity of mine. At least that is my excuse for not posting about all that I have been making recently. I do want to share it all, but I will spread it out so I don’t flood my otherwise quiet blog with too much noise.

The holiday season means a bevy of creativity in my studio. Decorating the house, organizing and filling the Advent calendar, creating a seasonal card, and making ornaments are just a few of the things on my to-do list.

This year, my card is a 3-dimensional construction – a little house. Photos (credit: Eji Eustaquio) adorn each surface of the house which was created using SketchUpPro. I printed the 3-dimensional box pattern on glossy photo paper, then used spray mount to glue it to heavy cardstock. Assembly involves cutting, folding, and gluing each of the boxes by hand, as well as adding a hanger ribbon. Mini candy canes are hidden inside; revealed by lifting the roof flap.

The ornament this year (shown as a prototype) is made from paper and felt; a small Himmeli gem made from rolled magazine paper, with an origami star above, and a felted wool ball and tassel below. The final version will likely use different colors of magazine paper for the Himmeli gem, and glossy or glittery origami paper for the star.

May you find inspiration for your own handmade holidays this season!

A necklace to catch love and optimism…

The dreamcatcher has has become a popular feature in retail displays, home decor, and DIY craft sites. I also created my own version of this Native American handmade object, blogging about it here.

I am inspired by all things handmade, and do not mean to offend by misappropriating sacred symbols. By interpreting the concept and adding my own meaning, the object is transformed into something that reflects the past but is open and inclusive of the present.

This latest felted necklace has been in my Etsy shop for awhile, but I wanted to share the meaning behind it. First of all, it is another example of spontaneous creativity. Little stacks of felt pieces and stainless steel washers sat untouched on my work table for weeks. Frankly, I am bored by production. Making one or two of any one thing is quite enough for me. Making more requires a level of commitment that is more occasional.

So while avoiding making more necklaces, I was making more wet felted wall pockets (among other things.) All scraps and cut edges were saved in a bin. And this is how a new necklace came to be. A combination of the cut scraps from the wall pockets and the washer necklace. The scraps became the fringe. Braids of alpaca yarn were added in between the felted fringe. The final piece reminded me of a dreamcatcher. As a necklace worn near the heart, I like to think of it as a catcher of love and optimism.

New life for old jeans…


Jeans are a staple in almost everyone’s wardrobe. I have about 8 pairs – all different styles and colors. Denim is versatile and rugged, outlasting many other fabrics. But when it is time to say goodbye to a pair of jeans, do you repurpose them? Send them to thrift? or toss them away? Hopefully not the latter. If repurposing is not within your means, then consider donating to thrift. Even if they are damaged beyond repair, most thrift stores send clothing elsewhere for recycling or reuse. (But always ask to make sure they don’t just send it to the landfill.) 

I pick up bags of unwanted thrifted jeans from a local thrift store for 20¢/lb. I’ve made denim yarn for weaving, and used bits for patching other jeans. There are literally hundreds of ideas online for how to repurpose jeans. My projects tend to be a modern or minimalist interpretation of a traditional design idea. Most recently, I was inspired to make floor pillows. Modern, durable, easy to clean – they will be perfect for using outside this summer at SouLodge Medicine Gathering 
Cutting off all seams, cuffs, zippers, and pockets, I used the best denim pieces to create a 20″x20″ pattern. I incorporated a scrap of orange upholstery as a complementary color accent to the modern design. Stuffed with a 24×24 thrift pillow, the jeans case is removable via a hidden orange zipper. Since the inner pillow was rather soft for a floor pillow, I open the seam and added leftover jeans scraps to the inner pillow to create a more dense fill.
Have you repurposed jeans? What has been your favorite project? Feel free to share ideas in comments below. Maybe your project will be inspiration for my next modern, minimalist project.

This little leather pouch…


Using leftover pieces of leather from the wall hanging I created for a school auction, I fashioned a small pouch to carry the essentials like an ID and credit card. The body of the pouch is one long piece folded onto itself and handstitched with artificial sinew. The tri-color macrame that adorns and lengthens the front flap uses two colors of natural alpaca wool yarn and a dark brown cotton embroidery floss.

But that is not how I first envisioned this project, of course. This is another blog post about working with frustration, changing or releasing expectations, and, in the end, not giving up. Because creativity is finding the work around when you think you have failed.

The macrame was an idea that came to me in a moment one day after seeing some modern macrame images online. I’ve done a little bit of macrame before, but never anything like a friendship bracelet – which is what this most resembles. Eight year olds make friendship bracelets all the time. I actually thought it would be easy. 

I found a pattern I liked, but decided to double it to 36 strings to fit the width of my pouch. My first mistake. Not drawing the wider pattern on paper – second mistake. I tied all the strings onto the short leather flap and just charged ahead, thinking I’d be able to figure it out as I went along.

I spent as much time undoing knots as I did tying them. I almost gave up on the project. I definitely put it aside for many days. Then yesterday, I decided to undo everything. I considered maybe starting over using different strings since the natural alpaca yarn was irregular in thickness and would sometimes unravel or fray in the process of tying knots. But in the process of undoing, I slowly worked back to a row of dark brown and stopped. The simple chevron seemed just right, imperfections and all. I trimmed the strings as tassels to match the length of the pouch. The thin leather strap was attached by threading the ends through two small slits cut in the crease of the leather flap and simply gluing the ends to the inside of the pouch. 

I am pleased, relieved actually, to have completed this project rather than tossed it aside. Giving up or quitting lingers on as regret. Creativity is the bridge between the vision and the actual execution; between giving up and trying again – and finishing.

Making to Manifest Spring…

The weather is warmer. The days are longer. New buds are showing on the trees. Spring Equinox is upon us. But with nights still near freezing here in Central Oregon, flowers are not quite ready to sprout. So I thought I’d make some felt blooms. It’s my way of manifesting what I hope to see soon outside. Color. Color. Color. And a bounty of sunshine.

I’ll be teaching a felt flower workshop at the end of April. If you are near Bend, Oregon consider joining me in celebrating spring by learning how to make flowers by combining the processes of wet felting and needlefelting. Details can be found on my Workshop page.