Back to the stars…

There are certain materials that are my comfort zone – my star materials. You’ve seen them here. Felt. Paper. I even own the domain paperandfelt.com just in case I ever choose to focus and create exclusively with those two materials. I do love them. They are stars that I reference and return to over and over in my creative making.

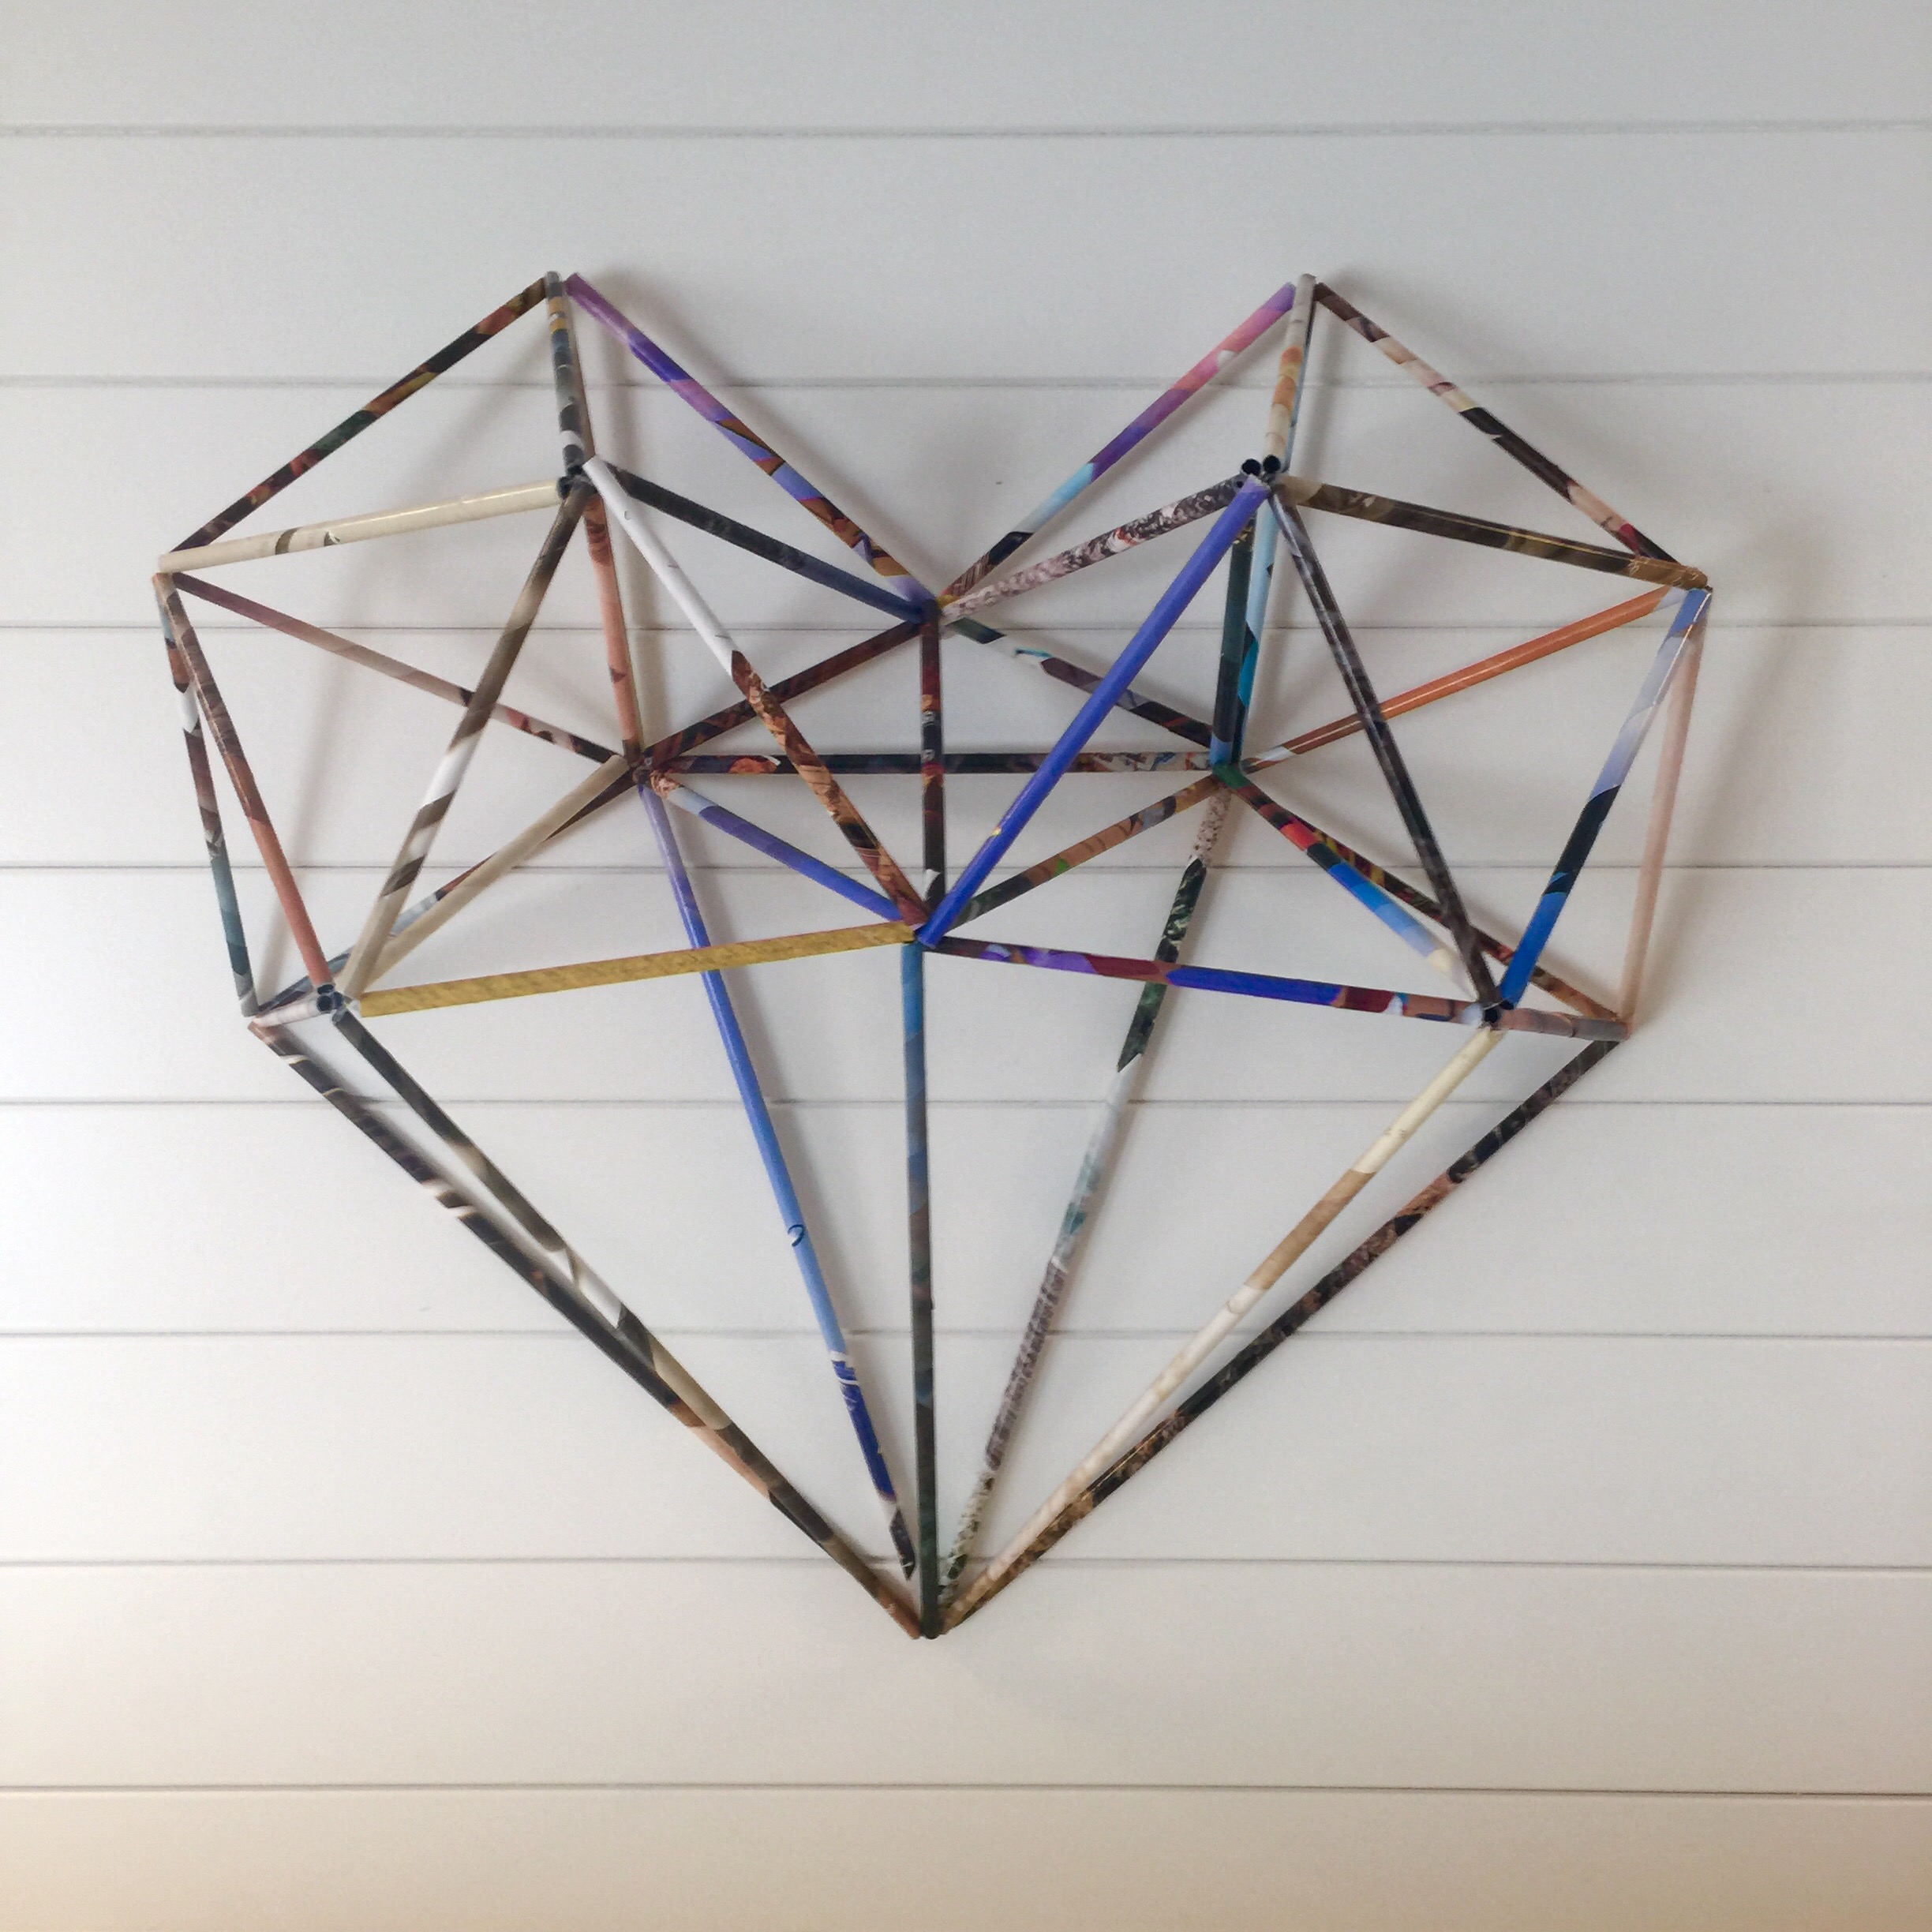
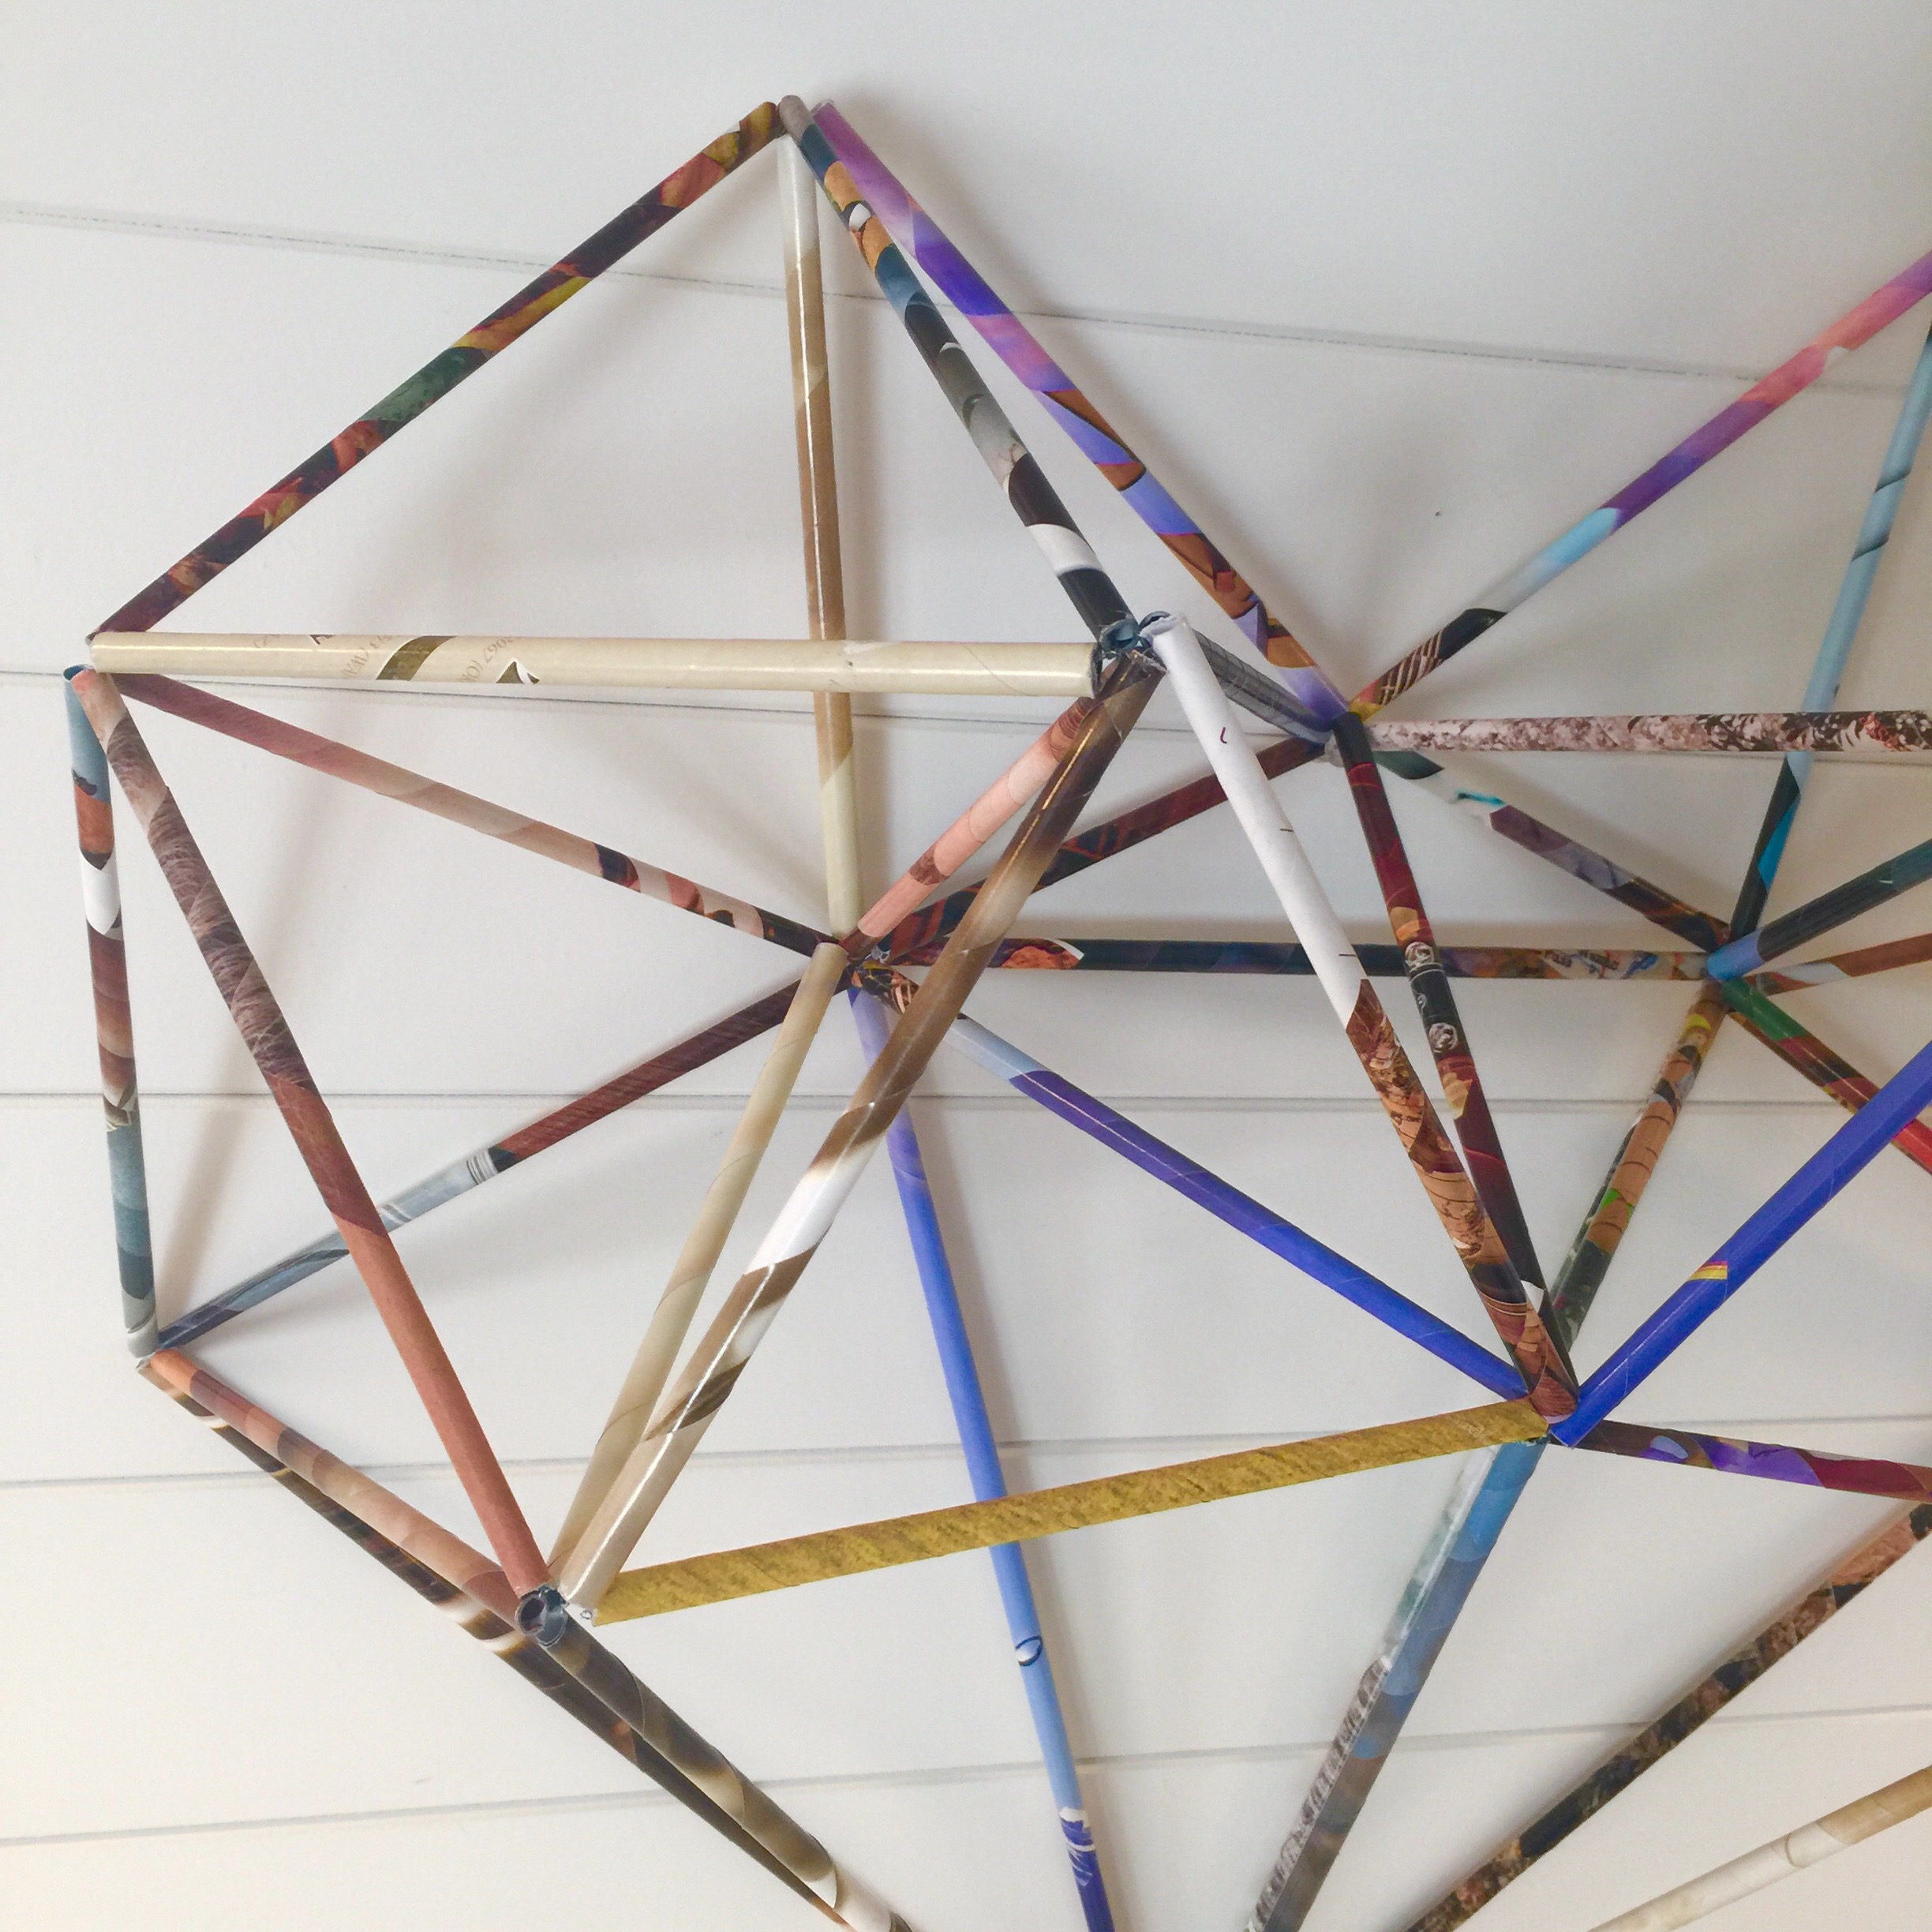
This geometric star is inspired by traditional Finnish straw ornaments called Himmeli. (The root word “himmel” means sky or heaven in German, Swedish or Norwegian.) The foundation of the Himmeli is the triangle. Tying varying lengths of straws into triangles, and then combining the triangles into 3-dimensional structures, you can create all sorts of beautiful sculptures. Made of tightly rolled magazine paper threaded on silver floral wire, this unique wall decoration is light enough to hang on a pin. I have used it to display tillandsia (air plants) and it even was the star topper to our tree last Christmas.

Look around the internet and you’ll see a variety of traditional Himmeli made from natural straw, and contemporary Himmeli made from metal tubes or colorful, plastic straws. May you find the inspiration you need to create your own.

One 4x4x8 cedar post…


We recently adopted a two-year-old cat from the local shelter. And since cats need to scratch things, I decided to make a scratching post – because why buy, when you can make? So I simply wrapped the base of an 8 ft long cedar (untreated) wood post with a couple spools of sisal rope. Since sisal is a natural material, the spools were slightly different colors, which I only noticed when I started wrapping with the second one. I used poultry wire staples to secure the rope. A locking wheel is attached at the base of the post to make it easily portable to different locations in the house. Both the wood and the sisal are great scratching surfaces. But unfortunately, we have since discovered that our cat prefers to scratch leather – in particular, my husband’s antique club chairs. So this scratching post will soon be redesigned and wrapped in leather.
An 8 ft long post is taller than necessary for a cat scratcher, so I sawed 30″ off. I used this piece to make a lawn dice game and a couple candlestick holders. Thanks to a local maker space called DIYCave, I had access to all the tools I needed to cut, sand, and drill to make the dice and candlestick holders.

New life for old jeans…


Jeans are a staple in almost everyone’s wardrobe. I have about 8 pairs – all different styles and colors. Denim is versatile and rugged, outlasting many other fabrics. But when it is time to say goodbye to a pair of jeans, do you repurpose them? Send them to thrift? or toss them away? Hopefully not the latter. If repurposing is not within your means, then consider donating to thrift. Even if they are damaged beyond repair, most thrift stores send clothing elsewhere for recycling or reuse. (But always ask to make sure they don’t just send it to the landfill.) 

I pick up bags of unwanted thrifted jeans from a local thrift store for 20¢/lb. I’ve made denim yarn for weaving, and used bits for patching other jeans. There are literally hundreds of ideas online for how to repurpose jeans. My projects tend to be a modern or minimalist interpretation of a traditional design idea. Most recently, I was inspired to make floor pillows. Modern, durable, easy to clean – they will be perfect for using outside this summer at SouLodge Medicine Gathering 
Cutting off all seams, cuffs, zippers, and pockets, I used the best denim pieces to create a 20″x20″ pattern. I incorporated a scrap of orange upholstery as a complementary color accent to the modern design. Stuffed with a 24×24 thrift pillow, the jeans case is removable via a hidden orange zipper. Since the inner pillow was rather soft for a floor pillow, I open the seam and added leftover jeans scraps to the inner pillow to create a more dense fill.
Have you repurposed jeans? What has been your favorite project? Feel free to share ideas in comments below. Maybe your project will be inspiration for my next modern, minimalist project.

Making to Manifest Spring…

The weather is warmer. The days are longer. New buds are showing on the trees. Spring Equinox is upon us. But with nights still near freezing here in Central Oregon, flowers are not quite ready to sprout. So I thought I’d make some felt blooms. It’s my way of manifesting what I hope to see soon outside. Color. Color. Color. And a bounty of sunshine.

I’ll be teaching a felt flower workshop at the end of April. If you are near Bend, Oregon consider joining me in celebrating spring by learning how to make flowers by combining the processes of wet felting and needlefelting. Details can be found on my Workshop page.

Collaborating for a cause…

Collaboration, like solo creation, usually starts with an idea, vision, or concept, that is then altered as the process unfolds. But unlike solo creation, collaboration affords many more opportunities for unexpected outcomes. When collaborating with young children, I like to set parameters for success by limiting color choices, size, and shape. In this class art project for the school auction, each Pre-K student made a circle-ish piece of flat felt using three colors of alpaca roving donated by Flying Dutchman Alpacas. A dinner plate set the size limit as they laid out the layers of roving in one main color. Two other colors of roving were added in the final layer in whatever design they chose.

After the student’s felt pieces were finished, I spent about a week just exploring different wall hanging ideas. I even worked with the children a second time to create felted wool balls that I thought would be a part of the final piece.  My original wall hanging concept just didn’t seem right anymore. Then a conversation with a friend sparked the idea of using leather as a backdrop for the felt.

Although I had never worked with leather before, I was up for the challenge. The leather was generously donated by Maverick Leather, and Warpony Saddlery punch all the holes for stitching, saving me countless hours. Each piece of leather was hand cut in an irregular circle to highlight the raw, organic shape of felt. A hand sewn saddle stitch in artificial sinew creates a contrasting border. Unseen are dozens of holes that I hand punched into each circle of leather so the children could easily hand stitch their felt piece onto the leather using wool yarn and a large eye needle. Their unique, individual stitches add more texture and personality to the wall hanging. Finally, a juniper branch was cleaned and sanded by a friend with all the right power tools.

The culmination was a large, colorful felt and leather wall hanging – a collaborative creation, made with love for the school auction.

Structure and the heart…


I’ve always considered myself to be spontaneous and flexible; a lover of change and newness. The only habit I’d claim was breaking them.

I have evolved in the last decade. And the change includes a great deal of love and appreciation for habits, structure and routine in my life. They create the mental and physical space within which creativity flourishes. Ironically, although I have been slow to adopt structure in my life, I have always appreciated structure in my making; from architecture and furniture to origami and geometric Himmeli.

Understanding the basic structure of something allows for elaboration and invention. Most Himmeli are based on the aggregation of triangles of different proportions. A 3D diamond gem-like shape is the simplest form. So creating a heart is just a matter of tying together a bunch of triangles – smaller ones on top for the humps, and longer ones for the point. For my Himmeli heart, I made tubes by rolling up old magazine pages, and then tied them together with silver floral wire. The final piece is almost 18 inches tall and is a beautiful adornment for our living room wall. I also made some smaller Himmeli with the leftover paper tubes.

For me, this Himmeli heart has become a symbol for the relationship between structure and creativity; that the spontaneity and flexibility I love and crave are best supported by a structure of routines and habits.

Catching inspiration…


The frequency and intensity of inspiration may vary from day to day, but I rarely am empty of ideas. And I am grateful for this flow. The challenge for me is to find time to attend to all of the ideas – which is, of course, impossible. If I am not already working on a project, a new idea becomes my next focus. Otherwise, I write them down as they come; recorded for some future date when I need inspiration.

About a month ago, I was hiking around Dillon Falls with my daughters and picked a single willow branch from the river’s edge. I’ve never worked with willow, but as I played with bending a twisting the branch, I was inspired to make a dream catcher. When we got home, I used hemp cord to wrap the branch into a circle-ish shape. And then life got in the way. A couple weeks later, I started weaving the dream catcher, adding wooden and hand felted beads at random intervals in the process. The weaving took several days; much longer than I anticipated. Life again required me to put the project aside.

I lost the flow. I’d stare at the dream catcher day after day and wonder how I would ever finish it. I had vague ideas, but nothing connected. Another week passed. Then, right before I had to leave for a day long gathering, inspiration struck. Worried that I would again lose the flow, I gathered all the materials together and photographed them in a pile. I needed to record my inspiration.

IMG_2475

And then again, life got in the way. Or maybe I just again lost the flow. It took several more days before I literally forced myself to act. Just one act on the dream weaver that would hopefully push me forward. I took the old sheets, ripped them into strips, and tied them onto the woven branch. Then I cut and tied lengths of  t-shirt yarn and wool yarn. The flow returned as I braided yarn. I decided to keep the colors of the dream catcher tail monochromatic. And when it was finished, I decided it was my “inspiration catcher;” for those ideas that I am not ready to use, but also not ready to release.

Gather in and Celebrate Fall…


Fall is a time for gathering in; nesting and preparing for winter. The temperature is crisp and chilly at the beginning and end of each day. The days become shorter and darkness is postponed by turning on the lights, or better yet, by burning candles.

To celebrate the seasonal changes, I created a simple centerpiece based on the concepts of an earth medicine altar. Incorporating representations of the four elements  – earth, sky,  fire, water – the centerpiece is a simple collection of natural and found items. A long irregular piece of leftover felt from a sewing project stretches along the length of the table. Aspen twigs, gathered from around my yard and tied with twine into a sort of effigy, serve as a frame to hold leaves, seeds, and feathers (air) picked up on a walk through the neighborhood. Some rocks (earth) that hold special memories are arranged at one end of the felt. Oil burning candles (fire) are placed at the other end. A few seashells (water) lay near the twigs.

I’d like to say we’ve enjoyed candlelit dinners for the past several nights, but sometimes the best intentions are forgotten in my family’s daily routine.

What treasures can you gather around your home and neighborhood to create a centerpiece altar to celebrate fall?

A wall pocket for an air plant…


Every air plant (Tillandsia) deserves a cozy felted wall pocket. This integral piece is wet felted by hand using a variety of natural brown to black alpaca roving from Flying Dutchman Alpacas here in Bend, OR. The pocket interior reveals a surprise of light cream felt, which blended with the dark roving during the felting process to make the pocket lighter than the background mat. A few of these wall pockets are available in my Etsy store.